15 Using Padlet to Flip the Student Role to that of Teacher
Paul Dervan
Introduction
Padlet is a free online tool that behaves like an online notice board. Using a variety of devices, students and lecturers can access it and post notes on a common page. It is very versatile as the notes posted by lecturers and students can contain links, videos, images and document files. There is no need for students to create accounts in order to interact with Padlet, however, lecturers will need to sign up and create an account.
Once registered with Padlet, a lecturer can create up to three free “walls” or online notice boards (known as Padlets). A subscription model applies if access to more than three walls is required, however, Padlets can be exported (as pdf and/or excel files) and can then be deleted and new ones created to stay under the free limit of three. Padlets can have customised privacy settings and can be individually set to private or public. This capability can facilitate lecturer confidential collaboration in a module.
While Padlet is capable of supporting a number of pedagogical strategies, the one that will be demonstrated here is flipping the role of students by allowing them to perform the role of lecturer using the concept of a ‘Gallery Walk’. A ‘standard’ Gallery Walk involves breaking a class of students into teams of three or four and setting each team a different task or question which must be researched within a defined time (say 30 – 45 minutes). Each team prepares material on its assigned question which is then presented (normally on a flip chart) by each team to each of the other teams.
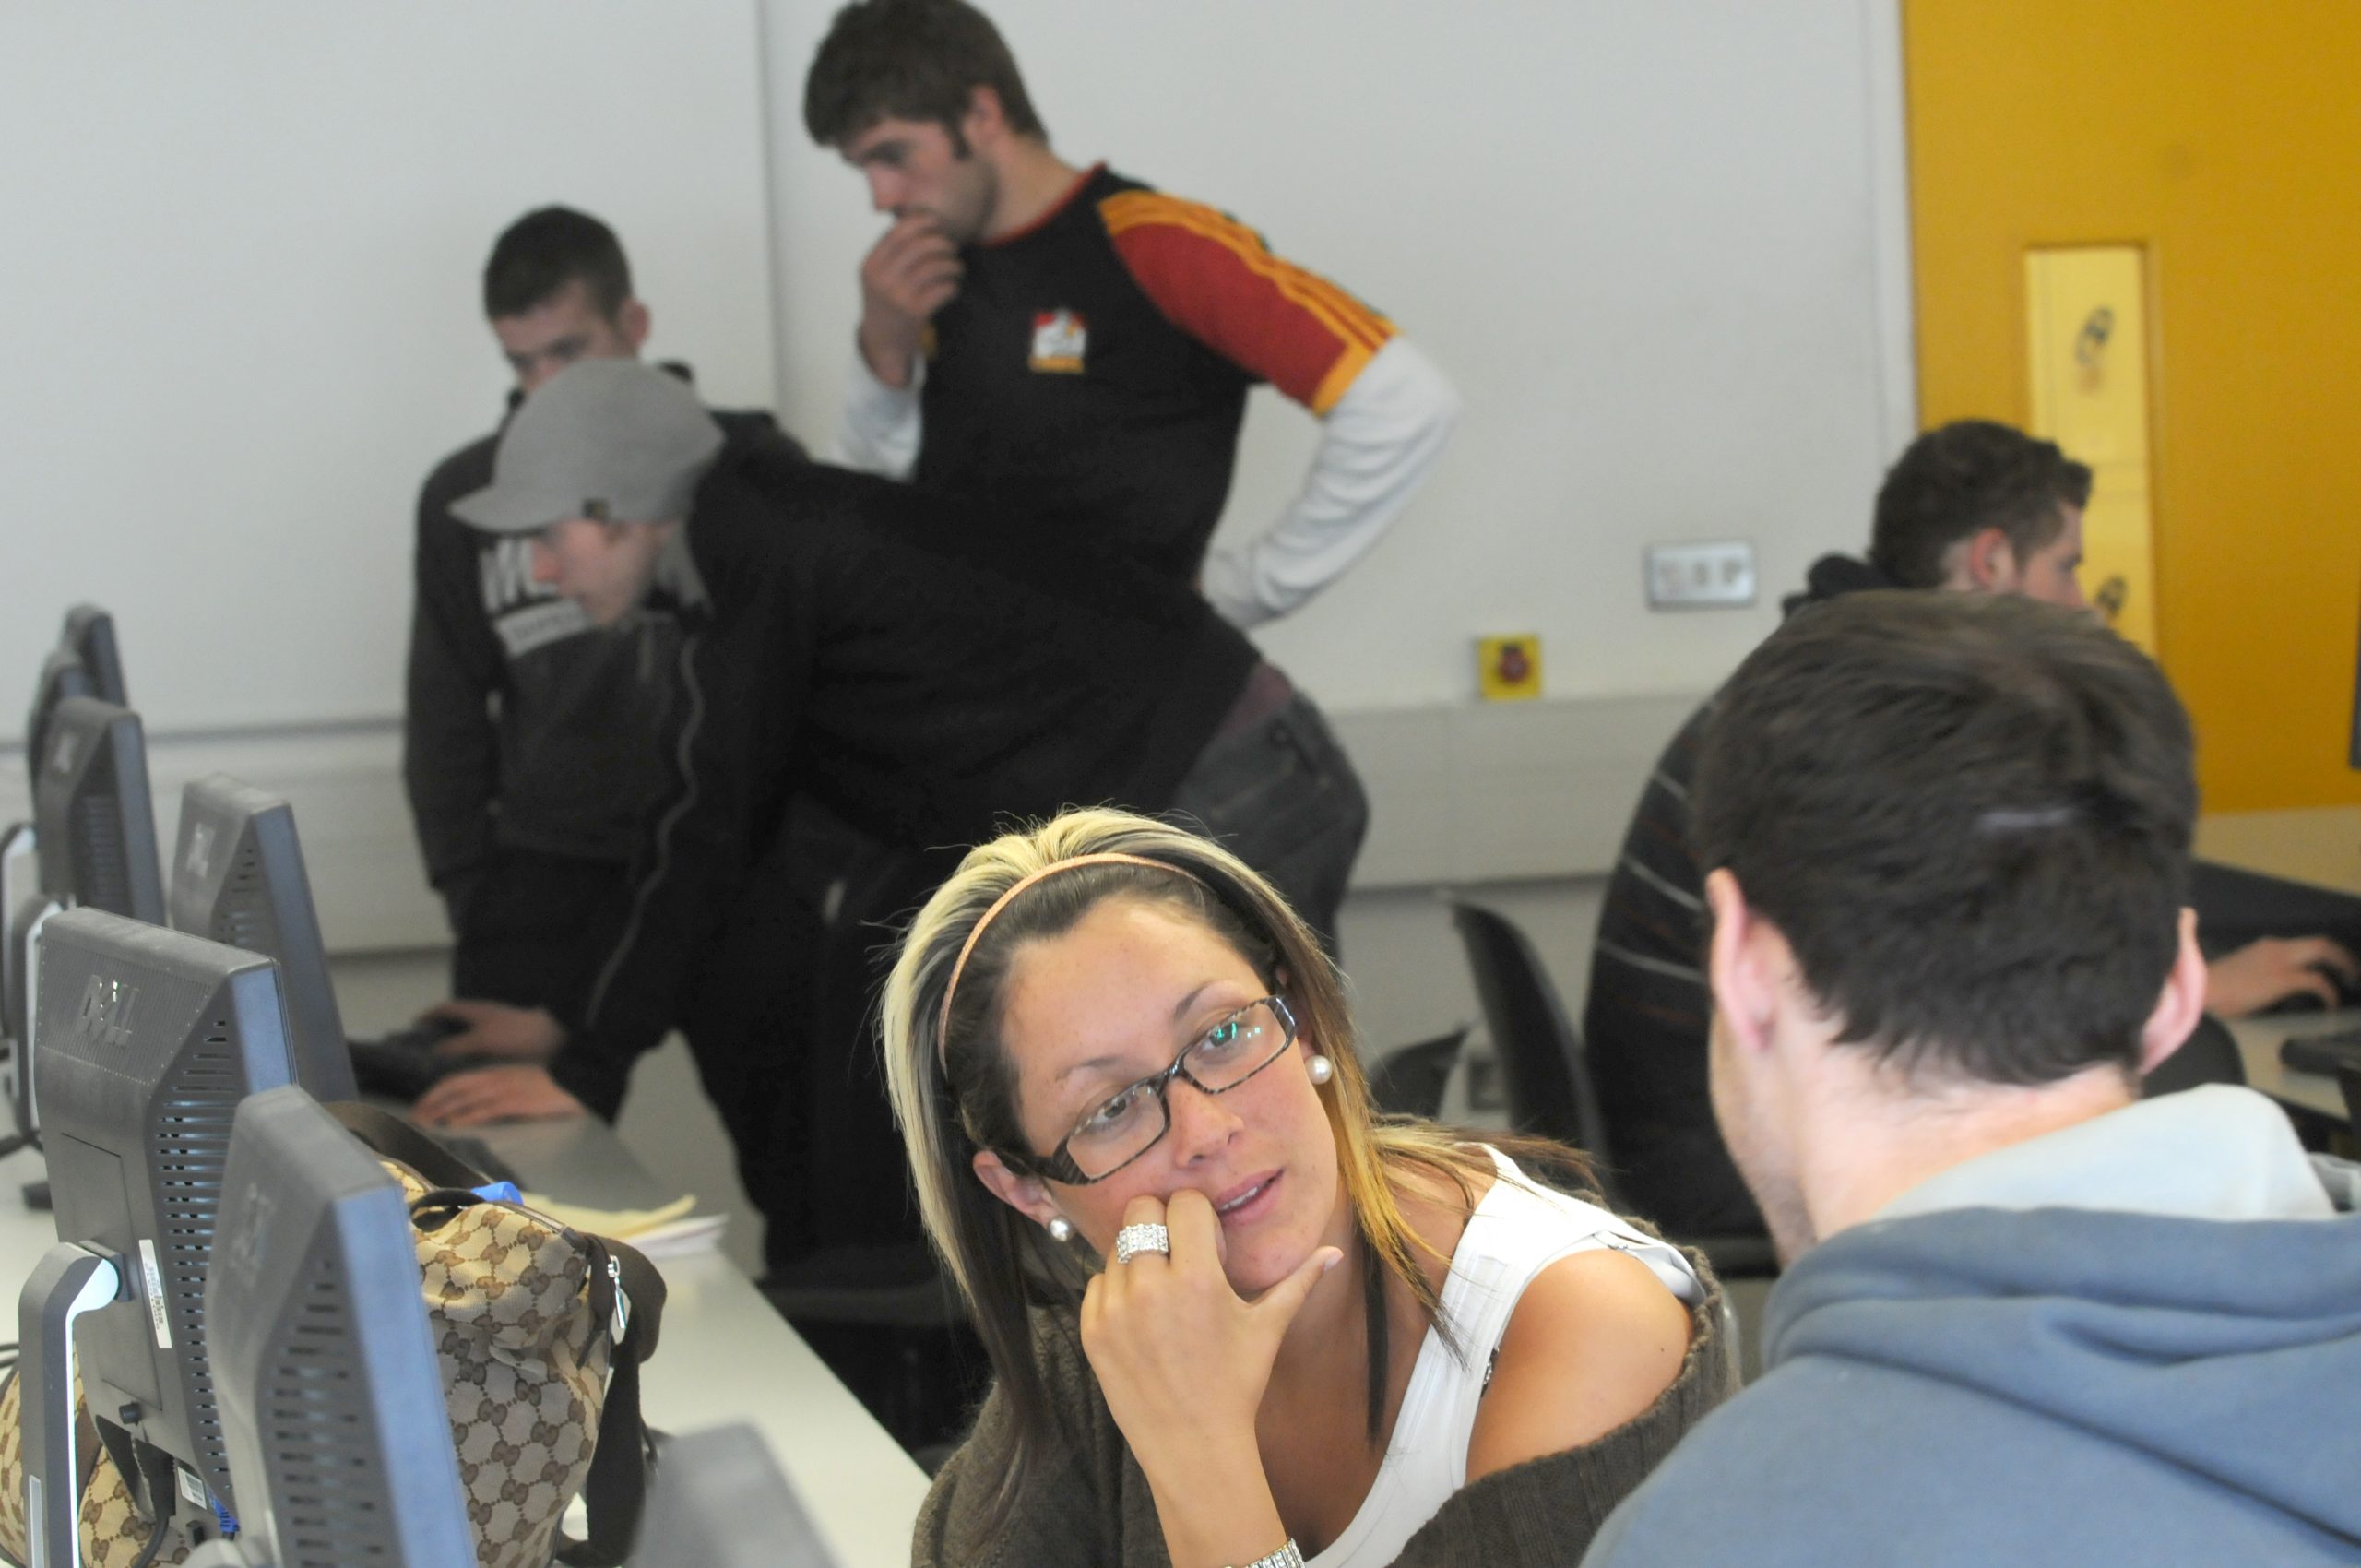
Adopting the idea for Padlet, each team researches its assigned question and creates a ‘post’ (which can comprise text, video or audio material) on a pre-prepared Padlet which addresses their question or task. All teams use the same padlet and so as the class progresses, the lecturer can see (using the class overhead projector and/or lecturer PC) the material that is being posted by each team. Once the preparation time has elapsed, each team presents its research or findings to the rest of the class using the material the team has posted to their area on the Padlet. The resulting discussion and interaction provide a rich student-centred learning environment which de-emphasises didactic teaching while still allowing the lecturer to provide significant guidance and input.
Resources
- A Padlet account
- A configured Padlet to capture student posts
- Classroom or lecture theatre with WiFi and lecturer PC connected to an overhead projector
- Questions or tasks (one per team of 3or 4 students)
Steps for Implementation
Step 1
Create a Padlet Account (www.padlet.com) by accessing the ‘Sign up’ button (see image below). You can sign up via Google or Facebook or simply supply an email address and password.
Step 2
Click on the ‘MAKE A PADLET’ button
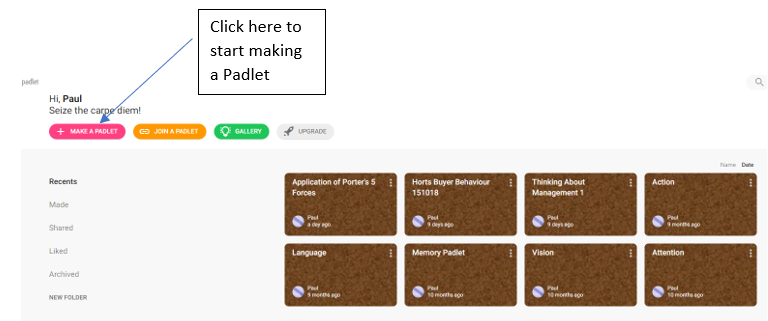
Note the three main menu options across the top of the screen. The one we are interested in this step is ‘Make a Padlet’ (see the call-out above). The Orange menu option allows you to join a padlet, you simply paste the URL of the ‘target’ padlet in and it will open for you. The Green option allows you to access free to use Padlets covering a diverse range of topics which might come in handy. Note some of the menu options are along the left-hand side. These facilitate the management of Padlets you have created. The eight boxes visible in the image are Padlets I have created, however, it should be noted that new users of Padlet can now only create three Padlets free of charge.
Configure your Padlet
With reference to the image overleaf, there are a number of steps to follow when configuring your padlet. A point to note is that once you have created a padlet it will have a default background and settings so step 2b is about customising your newly created padlet. Let’s go through each of these, one by one. The customisation process is started by clicking the setting button (gear wheel) on the top right of your screen.
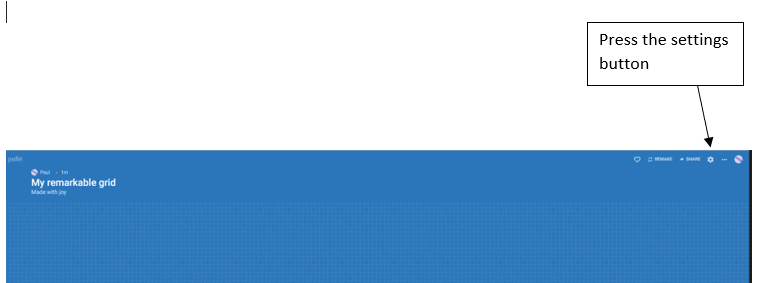
The ‘Modify’ menu will be presented and the customisation steps I recommend are as follows (with reference to the image below).
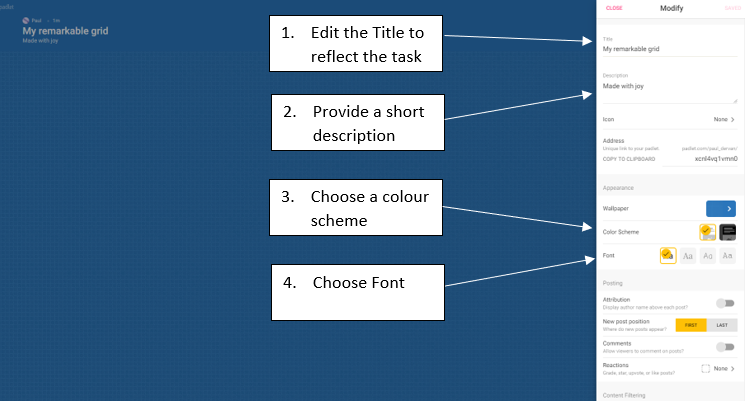
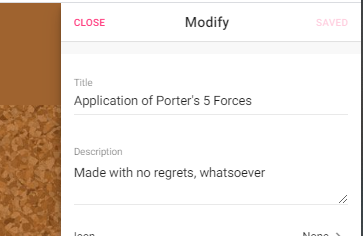
- Customisation Step 1 – Edit the Padlet Title to reflect the class task. For example, I named my padlet ‘Application of Porter’s Five Forces’ because it was a task for business students. Simply click in the ‘Title Box’ and enter your title text and it will be changed.
- Customisation Step 2 – Provide a short description. This could state the purpose of the Padlet. In my worked example, I chose not to modify the description allocated by the Padlet system but it is better to modify it.
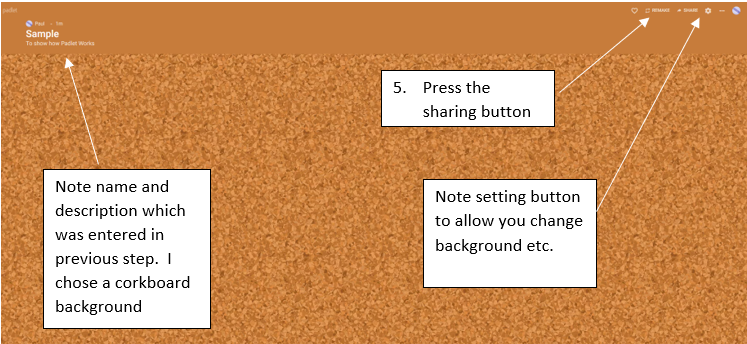
- Customisation Step 3 – Choose a colour scheme. You can select a colour scheme from the options presented. A point to note is that you can also change the ‘wallpaper’ which is effectively the padlet background. I tend to go for a corkboard background and you can select this from the ‘Wallpaper’ box just above the colour scheme box.
- Customisation Step 4 – This allows you to change the font of any text that will appear in posts made to the padlet. I tend to leave this at the default setting
Step 3
Set up your Padlet for Sharing
Having completed the customisation, we now need to prepare the padlet for sharing with students. The first thing to do is to close the ‘Modify’ menu by pressing the CLOSE button to the left of ‘Modify’ (see image below)
Now, with reference to the image below, we can press the ‘Sharing’ button to prepare the Padlet for sharing
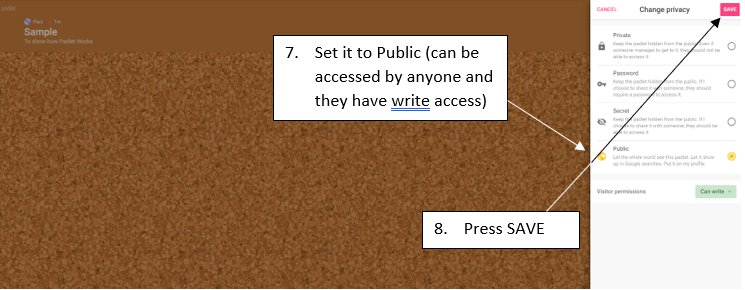
When the ‘Sharing’ button is pressed, the menu in the image below will be presented. The first thing to do is press ‘CHANGE PRIVACY’
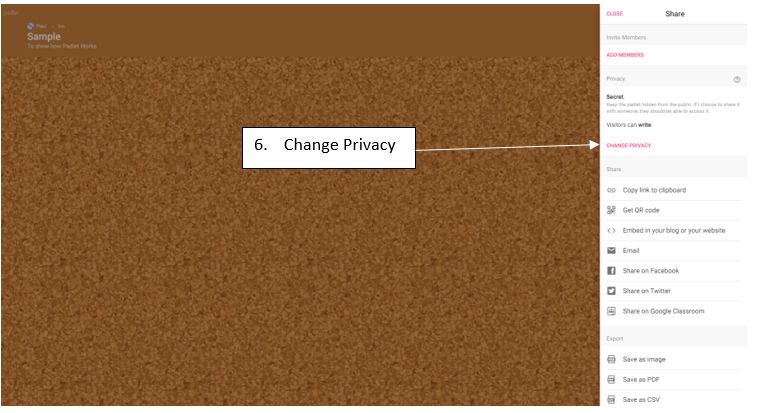
The next thing that we need to do is select ‘Public’ and also set the ‘Visitor Permissions’ (which is below ‘Public’ ) to ‘Can edit’ as in the image below and then press SAVE.
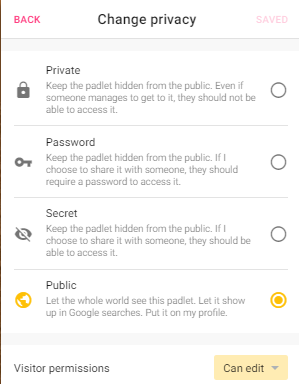
Once the new security option has been saved, the BACK button will be displayed as in the image overleaf. Press it to to get access to the ‘Copy link to clipboard’ button so that you can share the padlet link with students as set out in Step 4a overleaf.
Step 4
Copy the link for sharing with students
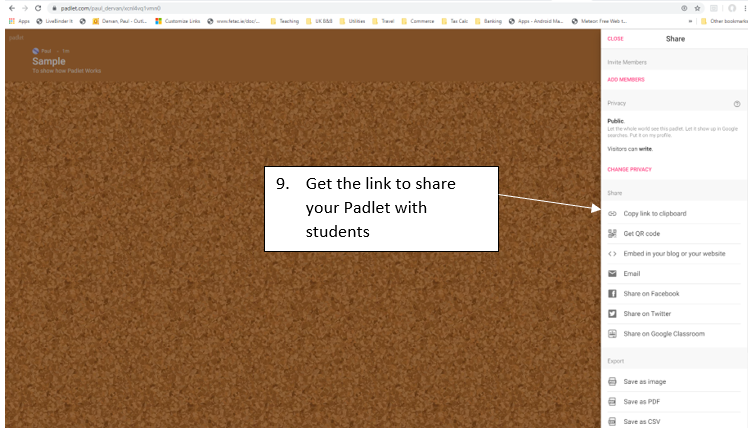
With reference to the image below, select ‘Copy link to clipboard’ so be able to share the padlet with students.
Circulate the link to students
There are two main ways the link can be shared with students:
- Email it to all students if you have a class email list
- Place it on your Learning Management System
I normally place it on the Learning Management System so students can access it during the class or indeed before the class.
Step 5
Execute the Gallery Walk
- Explain the task to the students including its pedagogical underpinning (students are active in research in order to construct answers to the questions posed; a great way to learn something is to explain it to others). Ensure the students understand the task.
- Divide the class into teams of 4 if possible. Get each team to nominate a timekeeper and a student who will access Padlet using a PC, Tablet so that the team’s output can be displayed on a padlet post.
- Log in to Padlet and display the session to the class using the overhead projector.
- If you are using Padlet for the first time with the students explain how each team can create their own post on the padlet. A post is created by pressing the ‘+’ button at the bottom right of the screen (see image below) or simply double-clicking in the padlet area. Alternatively, you can set up the posts for each team in advance naming them Team 1, 2 etc.
- Students should now commence the task, researching answers, gathering and presenting evidence by posting it to the padlet. It is important that they challenge each other in terms of how any answers are addressed and the evidence they will present.

- Specify time limits. These will depend on the number of teams and the extent of work required to answer the questions. It is important to allow sufficient time to allow each team to present its findings.
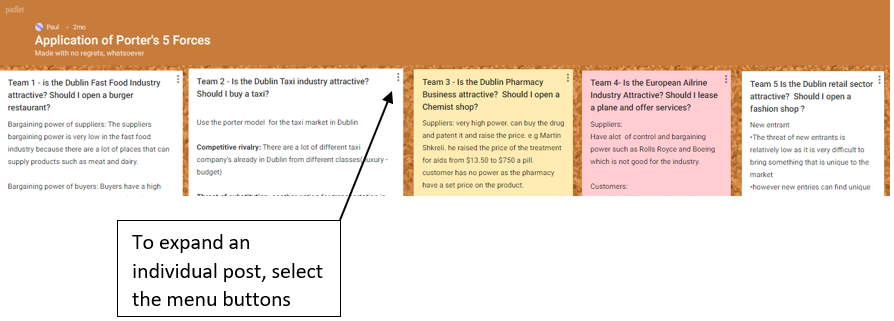
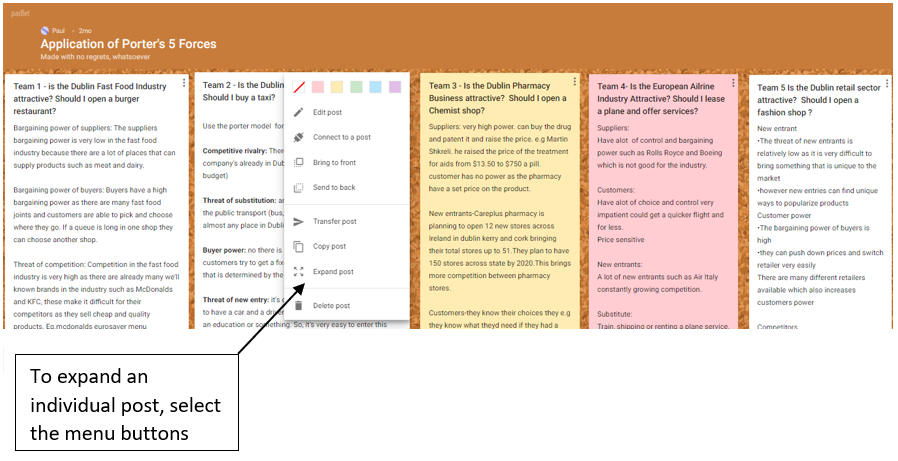
- When the allocated preparation time has elapsed, each team should present its findings with reference to the material that is on the post. This will allow the lecturer and the other students to challenge and engage with the students who are presenting. It can be a great way for the lecturer to uncover misunderstandings on the part of students and to correct those misunderstandings. Padlet allows posts to be selected in turn and presented prominently so this mechanism can be used in-class as the teams present their findings. To expand an individual team post, select the three-button menu as in the image below.
Select the ‘Expand post’ from the menu options as shown in the image below. Note the other menu options available.
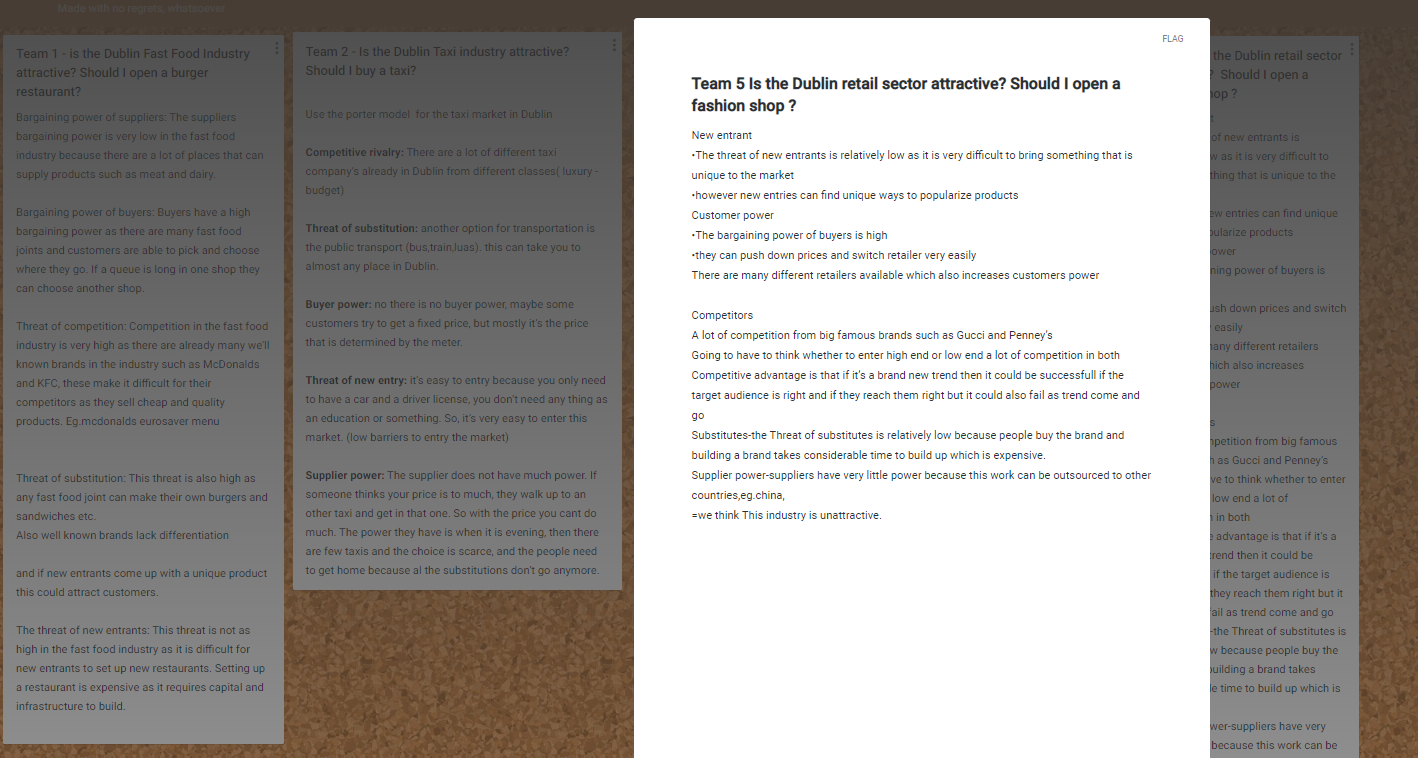
The image below displays an expanded post.
Top Tips for Success
Manage the Technology
- Ensure adequate WiFi coverage is available in the classroom.
- Ensure privacy setting on the padlet is set to ‘public’
- Use TinyURL (tinyurl.com) to shorten the padlet link before circulating it to students.
- If possible, post the link on your Learning Management System before you begin your class and/or email them the link.
- While padlet works effectively on mobile phones (and there is an App available), it can be helpful if each team has access to a laptop.
Manage the task
- Ensure students understand the task
- Agree on timelines with students for preparation and presentation
- Manage the time
- Keep energy levels and engagement high by circulating among teams
Further Reading
Dewitt, D., Alias, N., & Siraj, S. (2015). Collaborative learning: Interactive debates using padlet in a higher education institution.
Ellis, D. (2015). Using padlet to increase student engagement in lectures. Paper presented at the ECEL2015-14th European Conference on E-Learning: ECEl2015, 195.
Fuchs, B. (2014). The writing is on the wall: Using padlet for whole-class engagement. LOEX Quarterly, 40(4), 7.
Rashid, A. A., Yunus, M. M., & Wahi, W. (2019). Using padlet for collaborative writing among ESL learners. Creative Education, 10(3), 610-620.
Digital resources
- A Padlet developed by Dr Bill Hunter (UOIT) which provides links to teaching resources offered by a range of Teaching and Learning Centres in Canada and Ireland. https://padlet.com/BillHunter/hgkfca9boi07
- Three excellent primer videos on how to use Padlet 2019 from Russell Stannard (teachertrainingvideos.com). https://www.youtube.com/watch?v=X3Uf6pmpiG8
Author
 Paul Dervan BSc (IT), MBA is an award-winning author who has lectured undergraduate business students since 2003. His research interests centre on using technology in education including the enhancement of the assessment process. He is also keenly interested in developing students’ employability skills. In this endeavour, he has developed a close working relationship with the Transformation Learning Team at the University of Central Oklahoma. He is currently co-lead of the STLR (pronounced ‘stellar’) project at TU Dublin which is an initiative designed to enhance students’ employability skills. The initiative was awarded ‘Best Public Service Organisation’ by the local Business Chamber in November 2019. He also participates in Global Classes in conjunction with Durham College.
Connect with Paul
Linkedin Profile
