25 Adding interactivity to your instructional videos using H5P
Mark Keyes
Introduction
H5P is a free open source software for development of interactive HTML5 content, such as course presentations and interactive videos. H5P videos can be embedded on any website or VLE that is compatible with an H5P plugin, e.g. WordPress, Drupal, Moodle Blackboard, Brightspace. H5P offers the option to test the software, just be aware that the video created will be publicly available.
H5P is an excellent tool for adding interactions and self-tests to video content, improving engagement and helping learners to reinforce their understanding. The effectiveness of this approach is supported by educational research, which identifies the benefits of digital learning tools that offer the possibility of multimodal representation of course material, appealing to a range of learner needs and preferences (Clark and Mayer, 2011; Sankey, Birch and Gardiner, 2010) and optimising cognitive load (Chandler and Sweller, 1991; Mayer and Moreno, 1999).
Benefits of using H5P to add interactivity to your videos
- Allows learners to self-test their understanding as they view the video
- Adds a dynamic element to videos, improving learner engagement
- A variety of interactive elements are available, such as multiple-choice questions, drag and drop exercises, fill in the blanks and summary activities
- H5P is open-source and intuitive software that is easy to use for practitioners
- Compatible with YouTube for hosting your video content
- Easy to embed on a website or VLE
- Creates mobile-friendly content that works well on different devices
Resources
- Desktop/laptop computer with web browser
- H5P account (free)
- YouTube account (free)
Steps for implementation
Step 1: Preparation
- Create a free H5P account at https://h5p.org/
- Navigate to the ‘Example and Downloads’ page and select ‘Interactive Video’ to familiarise yourself with the interactive elements that are available, examples and the various tutorials.
- Select the instructional video/presentation to which you wish to add the interactive elements. This can be in any number of formats, e.g. video lecture, slide deck presentation, animated sequences and/or any combination of these. MP4 is the optimum format to save your video in when working on H5P.
- Plan your approach to adding the interactive elements, i.e. identify the most appropriate interactions and note the exact timings on the video for inserting each.
- Prepare your questions/text/script in advance for each of the interactive elements. Tip: you can cut and paste from a Word document directly into H5P.
- In H5P, select ‘My account’ > ‘Contents’ > ‘Create New Content’ and select ‘Interactive Video’
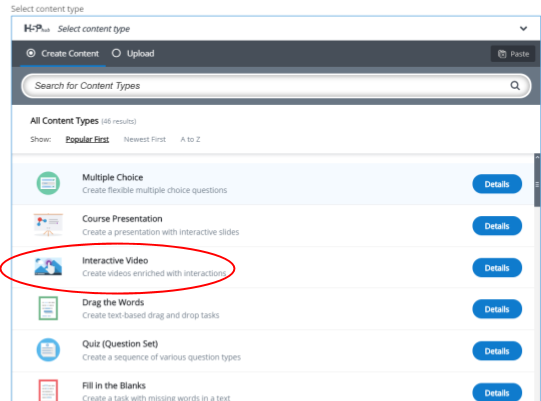
Figure 1: Selecting the content type
- This opens the interactive video editor
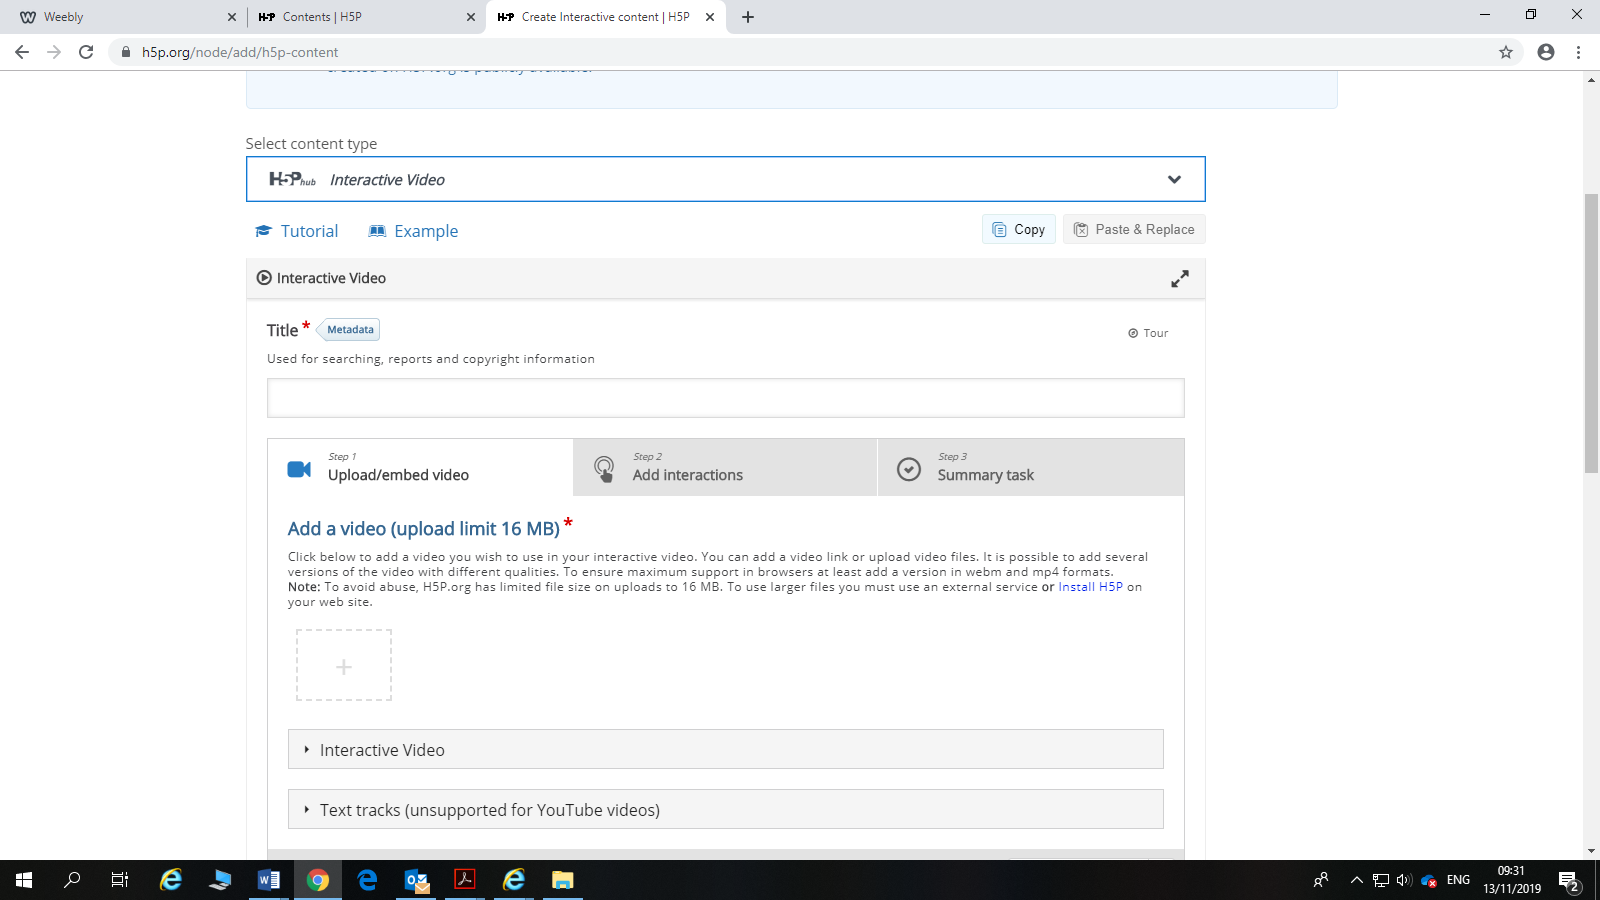
Step 2: Upload/embed video
Note that this is limited to 16MB. However, you can host your video on a free YouTube account, just click on add file and insert the URL or YouTube link.

Step 3: Add interactions
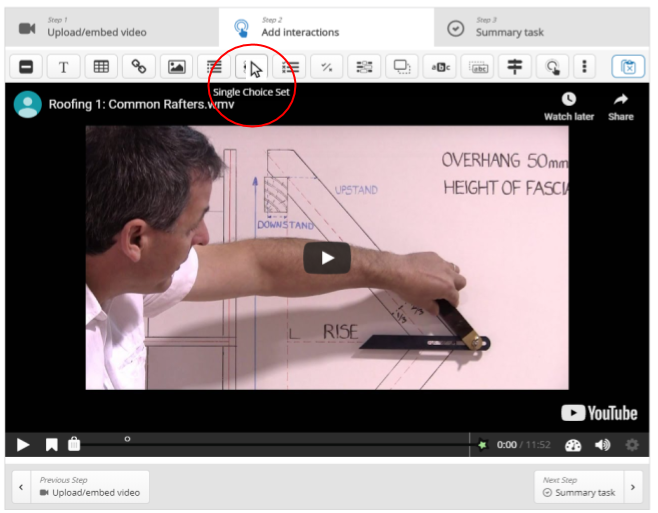
Once your YouTube video is added, it will appear in the small screen box (circled below). Next click on ‘Add interactions’.
This will open a new interface that displays the YouTube Video screen with a row of tabs above. From these tabs, you can select a variety of interactions to add at various points in your video. The type of interaction will appear below each icon as you hover the pointer over (see circled). For the purpose of this guidance, we will focus on adding ‘Single Choice Set’ questions as an example.
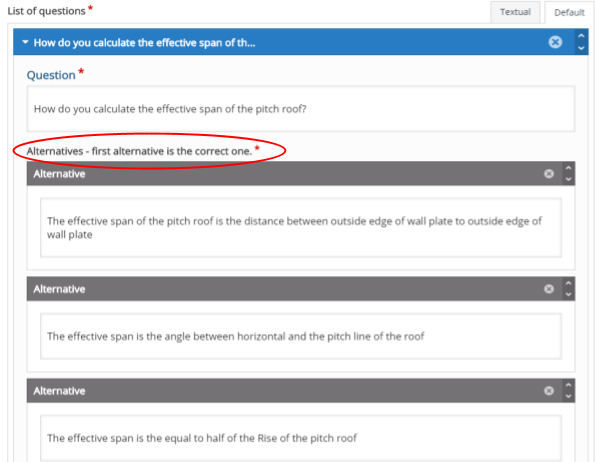
Click on ‘Single Choice Set’ tab and a new interface will appear. At the top, you will see the ‘Display time’ input boxes that allow you to enter the precise point that the interaction will appear at during the video. You can also tick the ‘Pause video’ box here if you wish to ensure that the learner answers fully and correctly before they can proceed through the rest of the video (recommended, in my opinion). You can also choose for the interaction to display as a ‘Button’ or a ‘Poster’ (poster being an expanded interaction that appears over the video).
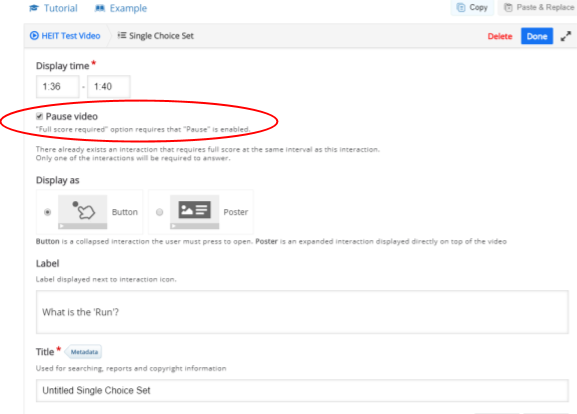
You can then enter your questions and answer (Alternative) options, with the first alternative set as the correct answer by default (circled below). In order to add further answer choices, simply click on the ‘Add answer’ button. You can add a series of Single Choice Questions.
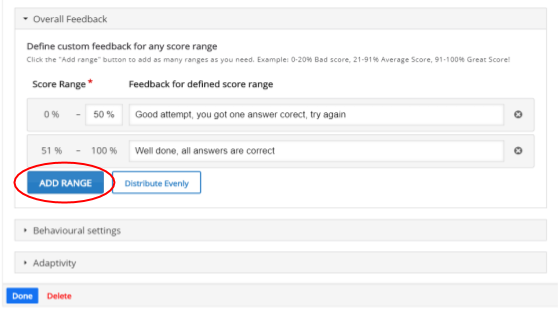
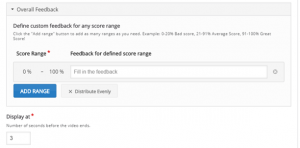
H5P also offers a very useful customised feedback option. This allows a simple method for providing feedback against the different score ranges achieved. Just click on ‘Add Range’ and set the percentage score range that you require and add customised feedback to each. This is useful for providing encouragement to learners and for prompting them to retry until they get all answers correct.
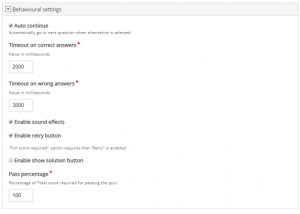
There are also a number of ‘Behavioural settings’, allowing you to set parameters such as ‘Auto continue’, timeouts on answers, sound effects and enabling the retry button. You can also set the ‘Pass percentage’ here that allows you to control the score required to pass the quiz.
An Adaptivity function is included to allow the possibility for learners to opt-out and continue with the video.
An Adaptivity function is included to allow the possibility for learners to opt-out and continue with the video.

Step 4: Add a Summary Task
When you have added your interactions, click on ‘Summary task’ (circled below) to open new interface. You can add a title here and some introduction text, which will appear above the interaction on the screen.
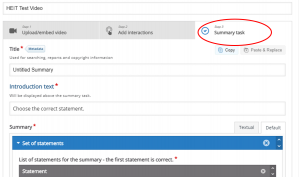
You now have the option to add a set of statements, the top statement being correct. The statements will appear randomly with users prompted to select the correct one.

Note: You may add a tip for the learner as a prompt. Additional sets of statements can be added until you are satisfied that the exercise tests the key learning points of the video.
Similar to adding interactions, there is the option here to add customised feedback. Again, this allows a simple method for providing feedback against different score ranges achieved. Just click on ‘Add Range’ and set the percentage score range that you require and add custom feedback to each.
Further Reading:
Chandler, P. and Sweller, J. (1991), “Cognitive Load Theory and the Format of Instruction”, Cognition and Instruction, Vol. 8 No.4, pp. 293-332.
Clark, R. C. and Mayer, R. E. (2011), E-learning and the science of instruction: Proven guidelines for consumers and designers of multimedia learning (3rd ed.), San Francisco, CA: Jossey-Bass/Pfeiffer.
Mayer, R. E. and Moreno, R. (1999), “Cognitive Principles of Multimedia Learning: The Role of Modality and Contiguity”, Journal of Educational Psychology, Vol. 91 No. 2, pp. 358-368.
Sankey, M., Birch, D. and Gardiner, M. (2010), “Engaging Students through multimodal learning environments: The journey continues”, Proceedings ascilate Sydney 2010. Retrieved online February 4th 2020 from http://www.ascilite.org/conferences/sydney10/procs/Sankey-full.pdf
Links to sample interactive videos:
https://qualibuildlearn.weebly.com/lesson-1.html
Author Bio:
 Mark is employed at TU Dublin since 2009, initially as a lecturer and currently as Operations Lead in the Learning & Innovation Centre at Blanchardstown Campus. With a background of over 20 years’ experience in the construction industry, he has been active in the development and delivery of up-skilling programmes in the fields of energy efficiency, renewable energy and building retrofit. Since 2011, he has managed a number EU funded project activities, including Build Up Skills Ireland (BUSI) and QualiBuild, where he led work packages developing upskilling programmes for construction workers in the field of low energy buildings. His research interests include active learning and the enhancement of learning via interactive/multimodal digital resources.
