1 Using Microsoft OneNote in Maths-based Courses
Caroline Ferguson
Introduction
OneNote is a great organizational tool that can be used to display course notes in a central location. This tech tool is especially useful for problem-solving courses such as math, physics, chemistry, and engineering courses when used in conjunction with a digital inking device such as a tablet.
Benefits of Teaching with OneNote
- All lecture material can be organized in one place
- You can write on your screen seamlessly
- Everything is automatically saved in the cloud – can be accessed anytime, anywhere
- Students can see your annotations in (almost) real-time on OneNote Online on their own laptops, cell phones, or tablets
- Students can open the lecture slides in OneNote and make their own annotations
Resources
- OneNote
- Outlook account
- Tablet/laptop with a digital pen
STEPS FOR IMPLEMENTATION
STEP 01 Create an Outlook account
If you already have an outlook account, (for example, an account that ends in @hotmail.com or @outlook.com), this step is already complete. If you don’t have an outlook account, go to www.outlook.com and click on “Create Free Account” and follow the prompts to create an account. You will need an outlook account in order to provide your students with a link to view your notes.
STEP 02 Open OneNote and create a new notebook
In OneNote, go to File > New > OneDrive. Then log in to your outlook account. Create a notebook name that corresponds to the name of your course/module.
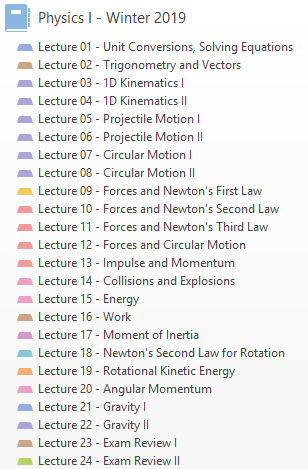
STEP 03 Create sections for each lecture
In your notebook, create a section for each lecture in your course. To do this, right-click on a section and select “New Section”. Double click on the new section to rename it according to the lecture number and topic. Figure 1 below shows an example of the sections created for a physics course.
STEP 04. Add lecture notes for each lecture
Begin by clicking on your lecture 1 section. Add pages by clicking on the “Add Page” icon near the top right of the screen. Change the paper size to letter or select the standard paper size in your area so that students are able to print off the lecture notes.
STEP 05 Create a new notebook for filled notes
Go to File > New > OneDrive and create a new notebook with your course name – Solutions. This will be the notebook that you use a digital pen to write out all the solutions in.
STEP 06 Provide students with a view link to both of your notebooks
Right-click on your notebook name and select “share this notebook”, then click on “Get sharing link”. There are two links you could provide to your students: a view link or an edit link. If you would like students to be able to add notes to the notebook, which would be visible to everyone, you can create an edit link. However, more commonly, an instructor will create a view link so that their students can only view the content. Create whichever type of link you desire, then copy and paste it into your learning management system. Figure 2 is a screen capture of these links embedded in the lecture notes content section in a Blackboard learning management system.
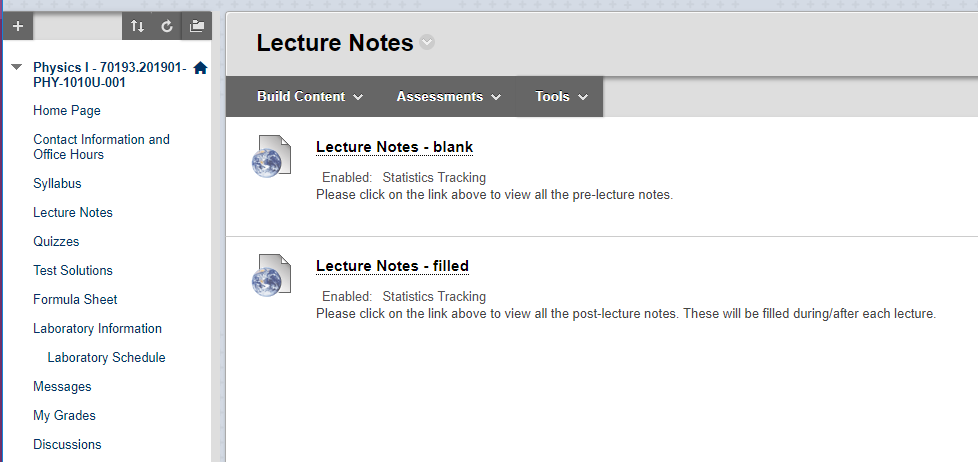
When students click on these links, they will be directed to a web app version of OneNote – OneNote online. Students do not require any software for this.
STEP 07 Copy section to solutions notebook prior to each lecture
Either at the beginning of each lecture, or prior to each lecture, right-click on the section that you are about to teach, and select “Move or copy”. Then select the solutions notebook, so that the section is copied into it. During the lecture, go through each slide in your current section in the solutions notebook. Use your digital pen to annotate the notes and write out your solutions. Model problems for your students and then encourage them to complete similar problems on their own or collaboratively with their peers.

Encourage students to click on the Solutions link that you posted in your learning management system. This will direct students to OneNote Online, where they can view your annotated solutions in (almost) real-time. Figure 3 above is a screenshot of OneNote Online, with annotated solutions.
WHAT CAN GO WRONG?
Internet goes down during class – If the internet goes down, students will no longer be able to see your annotations on their own device. Understand that this may happen from time to time, but if your laptop is projected on a screen for the class, it is not a big issue. Reassure your students that the annotations will sync once the internet connection returns. If you have a lot of data on your mobile phone, you might also consider hotspotting it for the duration of the class.
Long lag time – Depending on the internet connection and the number of students in the class, there may be a long lag time (up to one minute). Let the students know this in advance so they know what to expect.
Messy notes – If it is your first time using a digital pen, you may notice that your annotations are messy. Take some time to practice using your digital pen before class. During class, try to slow down while writing, to improve the legibility of your notes. If you want to write a full sentence during class, consider just typing it, rather than writing it out with your digital pen.
A student is unable to access OneNote Online – Occasionally, you may receive an email from a student telling you that he/she is not able to access the online notes. This may be due to temporary issues with OneNote Online (which I have noticed to happen once in the past two years), or with the student’s internet access. If a student notifies you that he/she is unable to access the online notes, you can simply print them as a pdf, and then email the document to the student, or post it in your learning management system for all your students to access.
FURTHER READING
Hammond, T., Valentine, S., Adler, A., & Payton, M. (Eds.). (2015). The impact of pen and touch technology on education. Springer.
Tront, J. G., & Prey, J. C. (2007, October). Workshop-tablet PCs in engineering education & research. In Frontiers In Education Conference-Global Engineering: Knowledge Without Borders, Opportunities Without Passports, 2007. FIE’07. 37th Annual (pp. W3A-1). IEEE.
Urban, S. (2017). Pen-Enabled, Real-Time Student Engagement for Teaching in STEM Subjects. Journal of Chemical Education, 94(8), 1051-1059. Retrieved from https://pubs.acs.org/doi/pdf/10.1021/acs.jchemed.7b00127.
ABOUT THE AUTHOR
 Caroline Ferguson is a Faculty Development Officer at the University of Ontario Institute of Technology. She offers educational support to the teaching community in areas of course development, technological teaching tools, and educational training and support. She is also a Sessional Instructor with the Faculty of Health Sciences and the Faculty of Science, where she teaches undergraduate physics and math-based courses. Caroline’s previous roles included working as a Physics and Engineering Specialist and a senior math and chemistry teacher. She holds a Ph.D. in Materials Science and Engineering from the University of Toronto as well as a Bachelor of Education from the University of Ontario Institute of Technology.
